Coloured Light
So the last shader we did had both ambient and diffuse lighting in it. But what if your light is coloured and has a varying brightness? All we have to do is add two more parameters and alter our light calculation in the pixel shader.
I have simply copied the existing AmbientDiffuseLight shader and re named it AmbientDiffuseColoredLight. At the top, between AmbientColor and LightDirection I have added the following
float
DiffuseIntensity = 1;
float4 DiffuseColor : Diffuse = float4(1,1,1,1);
float4 DiffuseColor : Diffuse = float4(1,1,1,1);
The pixel shader now looks like this
PS_OUT
PS_AmbientDiffuse(VS_OUT input)
{
PS_OUT output = (PS_OUT)0;
// Get ambient light
AmbientColor *= AmbientIntensity;
// Get diffuse light
DiffuseColor = (DiffuseIntensity * DiffuseColor) * saturate(dot(input.Light,input.Normal));
output.Color = AmbientColor + DiffuseColor;
return output;
}
{
PS_OUT output = (PS_OUT)0;
// Get ambient light
AmbientColor *= AmbientIntensity;
// Get diffuse light
DiffuseColor = (DiffuseIntensity * DiffuseColor) * saturate(dot(input.Light,input.Normal));
output.Color = AmbientColor + DiffuseColor;
return output;
}
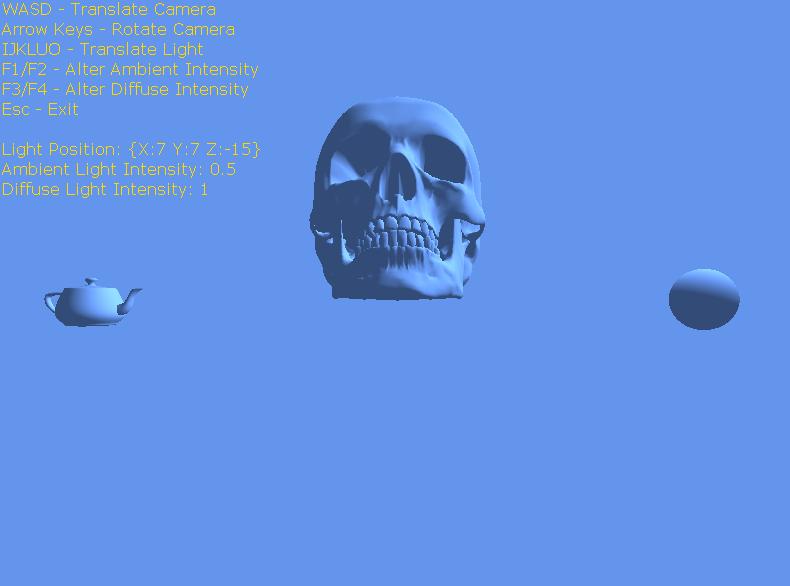
We first calculate the ambient light value, instead of putting this into another variable I have just used the global AmberColor, so multiplying its self by the intensity. Then we get the diffuse colour, multiply that by the diffuse intensity and then multiply that by our reflective light calculation. These two values are then added together and used to set our output colour.
This shader gives the following results:-
Gold, Red, CornflowerBlue and White Lights


Now, what if I want multiple lights in my scene? Well we then need to add a light calc per source of light in the scene. So we will have n light positions with n colors and n positions and these values will have to be passed to the shader.
Multiple Lights
To create multiple lights in the shader we are going to replace the diffuse colour, intensity and light direction with an array for each. The size of the array will depend on the number of lights you want to use in the scene. To help define the arrays in the shader we will define a macro. We will create 3 lights in this sample
So the diffuse lighting parameters now look like this
#define MaxLights 3
float DiffuseIntensity[MaxLights] = {1,1,1};
float4 DiffuseColor[MaxLights] : Diffuse = {float4(1,0,0,1),float4(0,1,0,1),float4(0,0,1,1)};
float3 LightDirection[MaxLights] : Direction = {float3(1,0,0),float3(0,1,0),float3(0,0,1)};
We then alter the VS_OUT structure so it can store the normalized light positions. NOTE: We can do this calculation in the pixel shader, but this would be over kill (IMhO) as we don't need this done per pixel as the light direction will apply to all pixels in the face, as is the case with the normal.
struct
VS_OUT
{
float4 Position : POSITION;
float3 Light[MaxLights] : TEXCOORD0;
float3 Normal : TEXCOORD3;
};
{
float4 Position : POSITION;
float3 Light[MaxLights] : TEXCOORD0;
float3 Normal : TEXCOORD3;
};
You will notice the TEXCOORD semantic jumps from TEXCOORD0 for the light member to TEXCOORD3, this is because the TEXCOORD0 defines the start of the members channel, there are 3 lights so Light takes up 3 channels; TEXCOORD0-2. If you increase the number of lights in the shader you will have to increase the TEXCOORD channel of the Normal member.
Our vertex shader is now altered to populate the light members with the normalized light directions.
VS_OUT
VS_AmbientDiffuse(VS_IN input)
{
VS_OUT output = (VS_OUT)0;
output.Position = mul(input.Position,wvp);
// Normalize the light directions
for(int l=0;l<MaxLights;l++)
output.Light[l] = normalize(LightDirection[l]);
output.Normal = normalize(mul(itw,input.Normal));
return output;
}
{
VS_OUT output = (VS_OUT)0;
output.Position = mul(input.Position,wvp);
// Normalize the light directions
for(int l=0;l<MaxLights;l++)
output.Light[l] = normalize(LightDirection[l]);
output.Normal = normalize(mul(itw,input.Normal));
return output;
}
Now all we need to do is alter the diffuse light calculation in the pixel shader. NOTE: Again, we could move this calc out to the vertex shader, but the quality of the lighting would be greatly reduced.
PS_OUT
PS_AmbientDiffuse(VS_OUT input)
{
PS_OUT output = (PS_OUT)0;
// Get ambient light
AmbientColor *= AmbientIntensity;
// Get diffuse light
float4 TotalDiffuseColor = float4(0,0,0,0);
for(int l=0;l<MaxLights;l++)
TotalDiffuseColor += (DiffuseIntensity[l] * DiffuseColor[l]) * saturate(dot(input.Light[l],input.Normal));
output.Color = AmbientColor + TotalDiffuseColor;
return output;
}
And Ta Daaa! A multi light shader giving this result

Specular Light
Specular reflection is used to simulate smooth, shiny or wet surfaces. There are two methods (that I know of thanks to Engel) to get a specular effect, one created by Bui Tong Phong in 1975 (I was 4 that year) known as Phong Reflectance and a modification to this by Jim Blinn in 1977 known as Blinn-Phong Reflectance. I am only going to apply the latter in this post, the Blinn-Phong model and I will only apply this to a single light shader.
As with our ambient light shader we need a WorldViewProjection matrix and we also need a world matrix, we will apply this specular effect with an ambient and diffuse light also.
float4x4
world : World;
float4x4 wvp : WorldViewProjection;
float AmbientIntensity = 1;
float4 AmbientColor : Ambient = float4(.5,.5,.5,1);
float DiffuseIntensity = 1;
float4 DiffuseColor : Diffuse = float4(1,1,1,1);
float3 LightDirection : Direction = float3(1,1,0);
float4x4 wvp : WorldViewProjection;
float AmbientIntensity = 1;
float4 AmbientColor : Ambient = float4(.5,.5,.5,1);
float DiffuseIntensity = 1;
float4 DiffuseColor : Diffuse = float4(1,1,1,1);
float3 LightDirection : Direction = float3(1,1,0);
We now need three new parameters in the shader, one for the specular color, one for its intensity and one for the camera position. We need the camera position as the effect is derived from the position of the viewer in contrast to both the ambient and the diffuse reflectance. So what the viewer sees is the degree of "shine" in relation to the angle of reflection from the surface, in the case of the Blinn-Phong method we use the "half" vector that lies between the direction of the viewer and the direction of the light.
float4
SpecularColor : Specular = float4(1,1,1,1);
float SpecularIntensity : Scalar = 1;
float3 CameraPosition : CameraPosition;
float SpecularIntensity : Scalar = 1;
float3 CameraPosition : CameraPosition;
The only change we need to make to the structures is to add a CameraView member to hold the viewers direction relative to the object in the VS_OUT structure.
struct
VS_OUT
{
float4 Position : POSITION;
float3 Light : TEXCOORD0;
float3 Normal : TEXCOORD1;
float3 CamView : TEXCOORD2;
};
{
float4 Position : POSITION;
float3 Light : TEXCOORD0;
float3 Normal : TEXCOORD1;
float3 CamView : TEXCOORD2;
};
Our vertex shader changes a bit too
VS_OUT
VS_AmbientDiffuse(VS_IN input)
{
VS_OUT output = (VS_OUT)0;
output.Position = mul(input.Position,wvp);
output.Normal = mul(input.Normal,world);
output.Light = LightDirection;
output.CamView = CameraPosition - mul(input.Position,world);
return output;
}
{
VS_OUT output = (VS_OUT)0;
output.Position = mul(input.Position,wvp);
output.Normal = mul(input.Normal,world);
output.Light = LightDirection;
output.CamView = CameraPosition - mul(input.Position,world);
return output;
}
As you can see, the transformation of the normal has changed, we are using the world parameter to transform the normal now and passing as is to the pixel shader, we do this so we can use it to transform the view vector there. This will also work on the previous shaders and is probably more efficient than passing a Inverse, Transpose, World matrix. Also, the light is passed strait through without normalization. This is because all normalization is going to be done in the pixel shader as the interpolation between the vertex and pixel shader do not always output vectors that are of unit length (almost quoted verbatim :p)
As I am sure you have suspected we have also got to make changes to the pixel shader to calculate the specular reflection and apply this to our ambient and diffuse colour output.
PS_OUT
PS_AmbientDiffuse(VS_OUT input)
{
PS_OUT output = (PS_OUT)0;
float3 Norm = normalize(input.Normal);
float3 LightDir = normalize(input.Light);
// Get ambient light
AmbientColor *= AmbientIntensity;
// Get diffuse light
DiffuseColor = (DiffuseIntensity * DiffuseColor) * saturate(dot(LightDir,Norm));
float3 Half = normalize(LightDir + normalize(input.CamView));
float specular = pow(saturate(dot(Norm,Half)),25);
output.Color = AmbientColor + DiffuseColor + ((SpecularColor * SpecularIntensity) * specular);
return output;
}
The ambient and diffuse calculations are the same as before but we have to do a bit more for the specular effect. First of all normalize the light and normal vectors and use these in the diffuse light calculation, then find the "half" vector so we can use it with the now normalized normal to get the specular effect. Then once all are calculated we put them all together and send them to the screen.
Resulting in this effect

In the accompanying solution you can move all three lights and alter there intensity, I have not added the ability to change specular values (running out of Xbox buttons), but I am sure you will be able to manage that if you implement it your self.

You can download the solution for this post here.
We have covered a fair bit of ground there, but I have enjoyed writing it as going back over it helps it solidify in my mind, so even if no one reads these posts, they are doing me the world of good :) Not sure what I will put in Episode 3 yet, textures and bump mapping I guess or even go over hemispheric lighting. As ever your C&C are welcome...
broken
ReplyDeleteI guess you are after the set lol, will fix ASAP :P
DeleteLink fixed.
DeleteThank you for the examples and tutorial HLSL is very interesting and not too many people who write about him.
ReplyDelete